Version 1 of this blog was going to be a long and winding affair that went through re-configuring FreeNAS0 with all the config from FreeNAS1, MANUALLY. The more I thought about what needed to be changed, the more I began to think saving the config from FreeNAS1 and uploading to FreeNAS0 was the right approach. Sure, I knew this would cause some problems (such as networking and passwords) but I decided it was the lesser of two evils, a bit like my vote in today’s General Election!
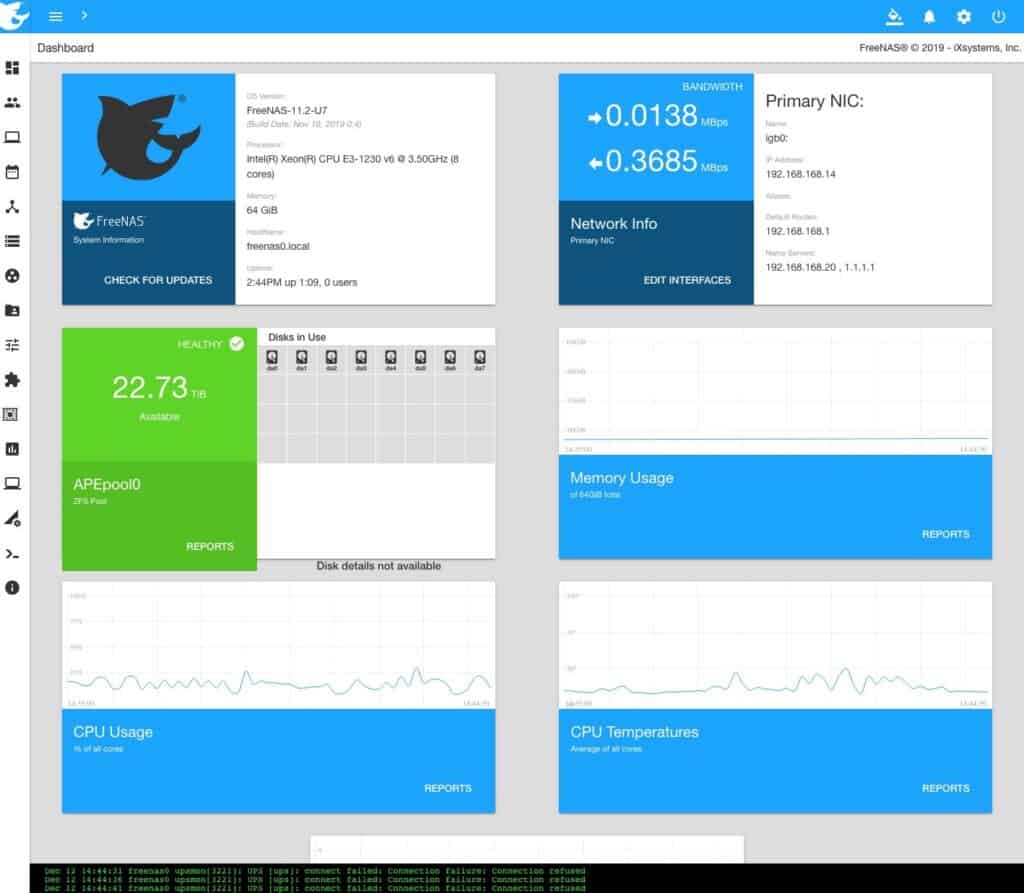
The first thing I’d done, which I covered in the Build 2 blog, was to create the pool, which I named APEpool0 (APE Consulting Ltd is the name of my company) and is consistent with the other 2 builds. Next, I’d configured the networking, adding an interface and assigning a fixed IP address.
I then disabled all of the existing replication tasks from FreeNAS1 to FreeNAS2. There were several, as these were created for specific datasets rather than the whole pool, partly due to size restrictions on FreeNAS2, but also to allow different properties for each dataset (I keep snapshots of pictures and documents longer than media files).
Next, I needed to enable the SSH service, and after a few failed attempts, eventually got the replication from FreeNAS1 to FreeNAS0 started. Although I’d used Google and found a few helpful guides, the manual is actually your best friend here. Another useful tip is to try SSH’ing to each other using the appropriate passwords (at this point I also reset the root password on FreeNAS0, which I’d just set as root during the installation – it’s now something much more secure!). Also, using the semi-automatic settings is a big help and something that wasn’t there the last time I set all this up. The last thing I had to do was move the system dataset from the pool onto the boot device. I might leave it there, or move it back once everything has transferred.
The way I’ve actually done this is to create a periodic snapshot of APEpool1, including recursive datasets, and then to create a replication task to send this from FreeNAS1 to FreeNAS0, as below:

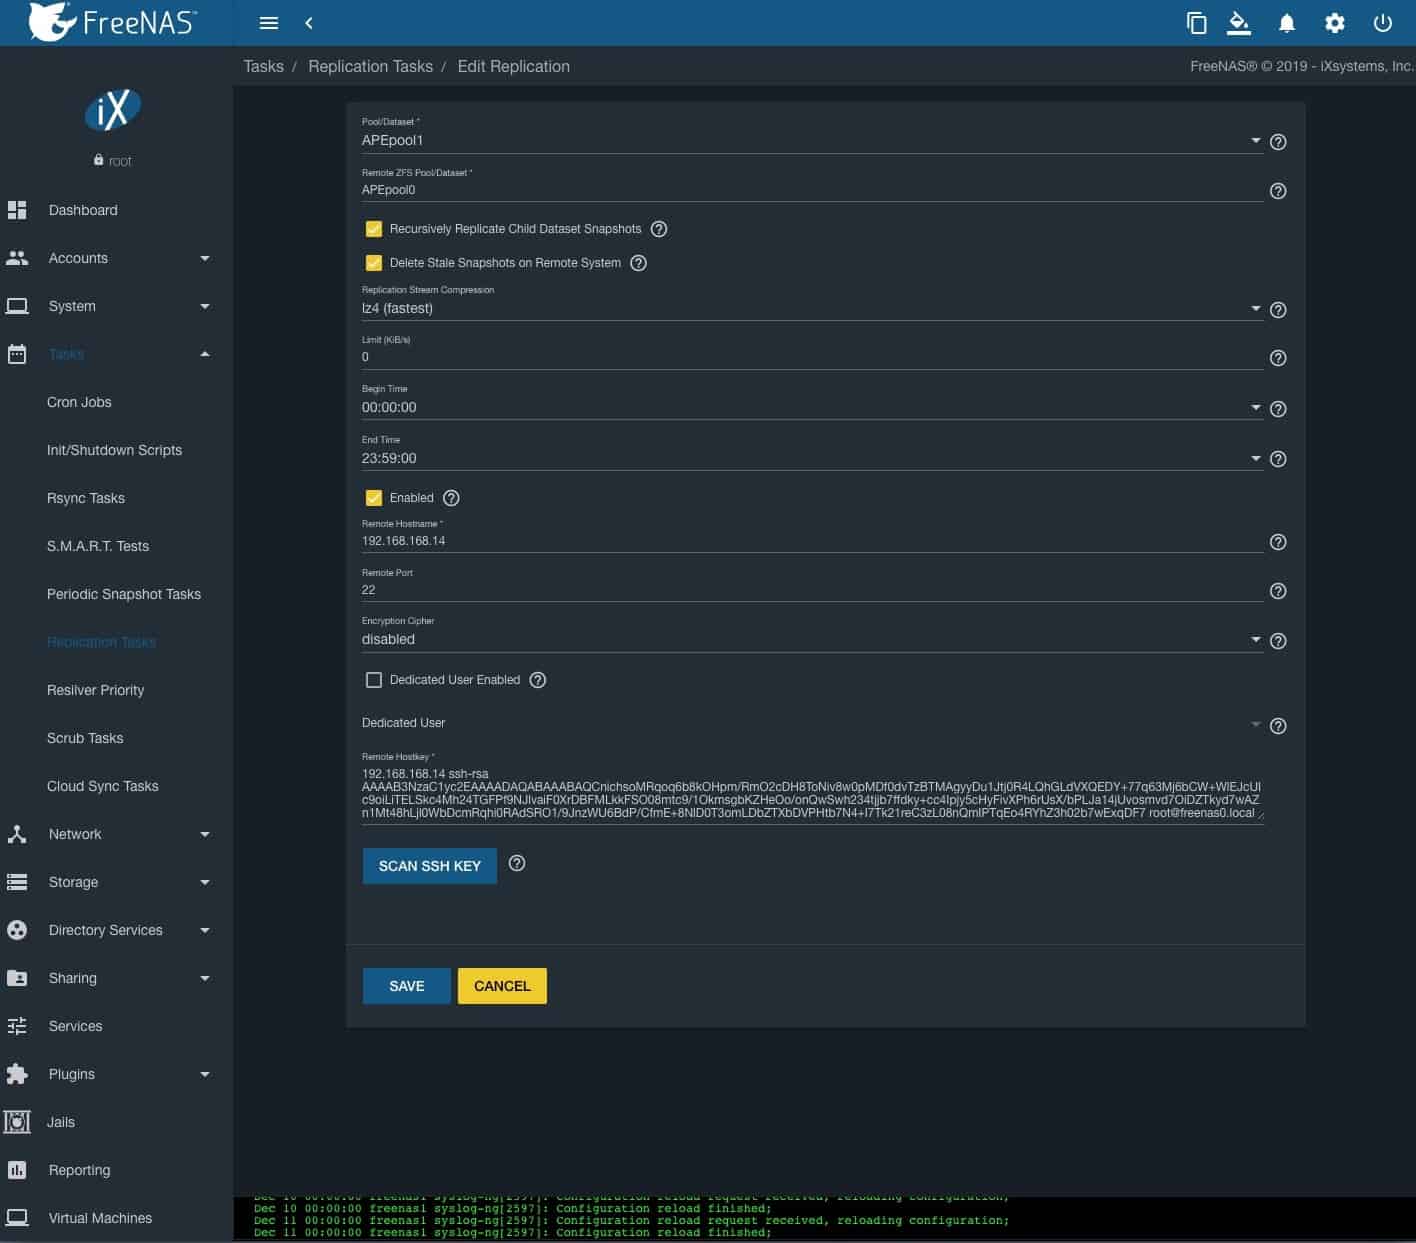
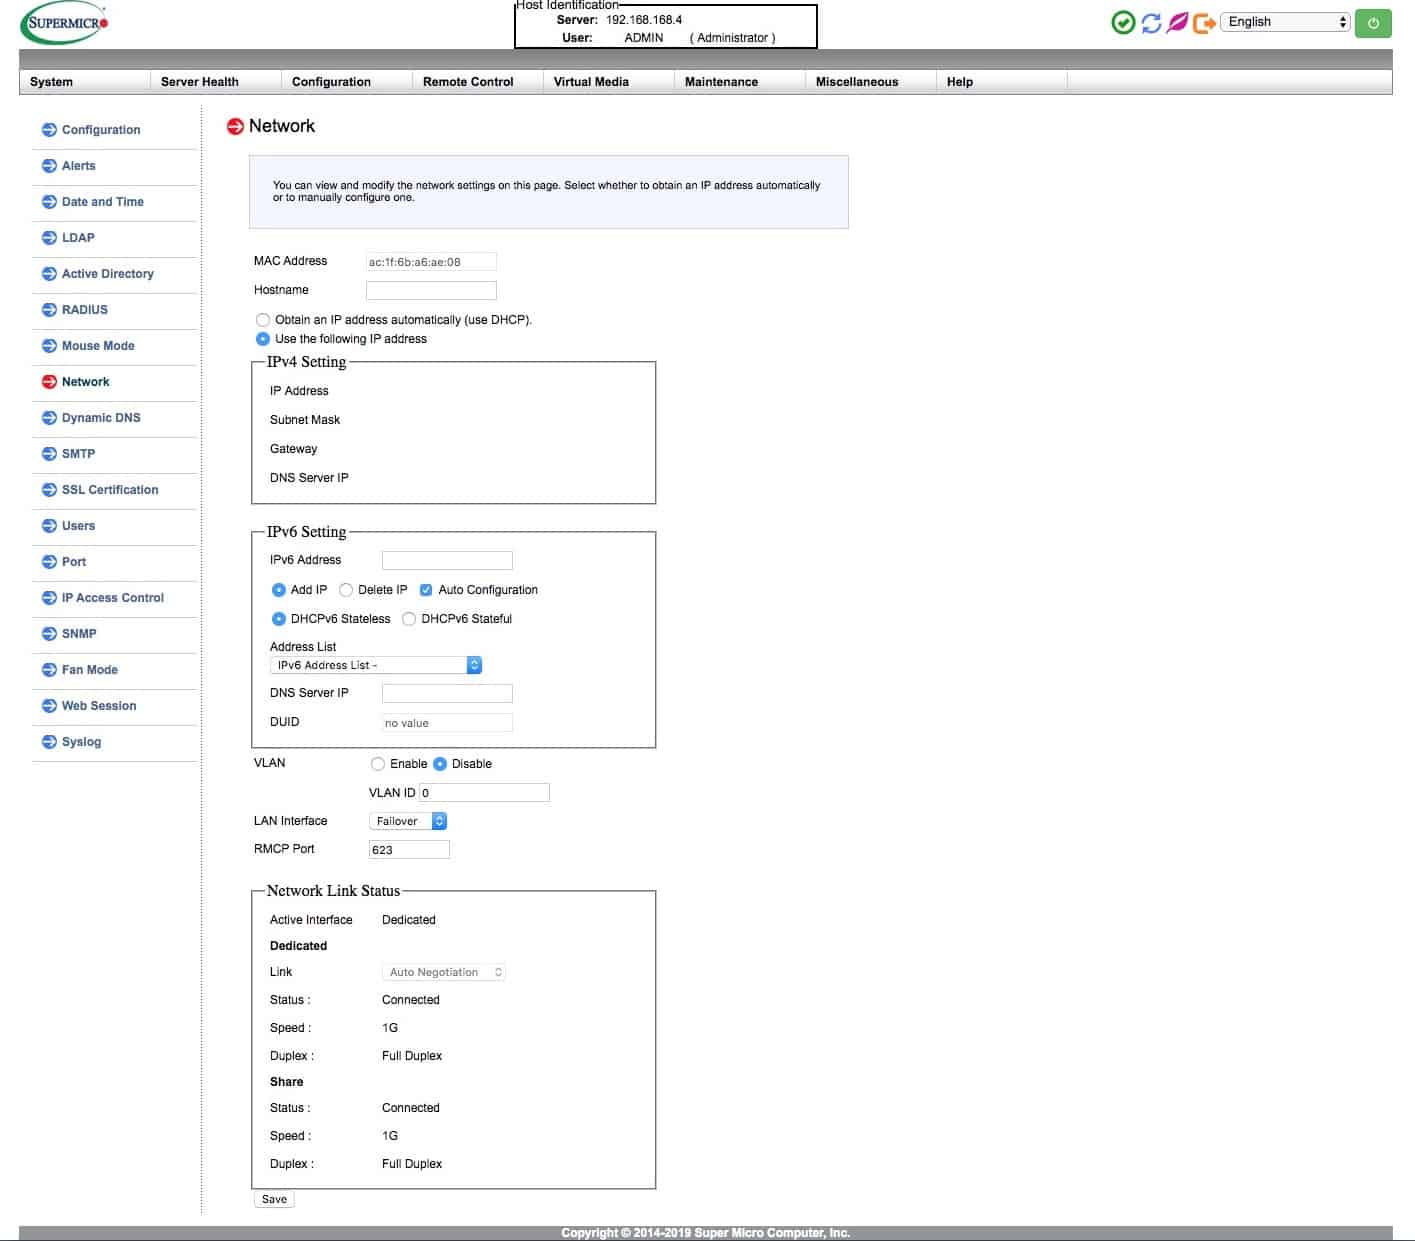
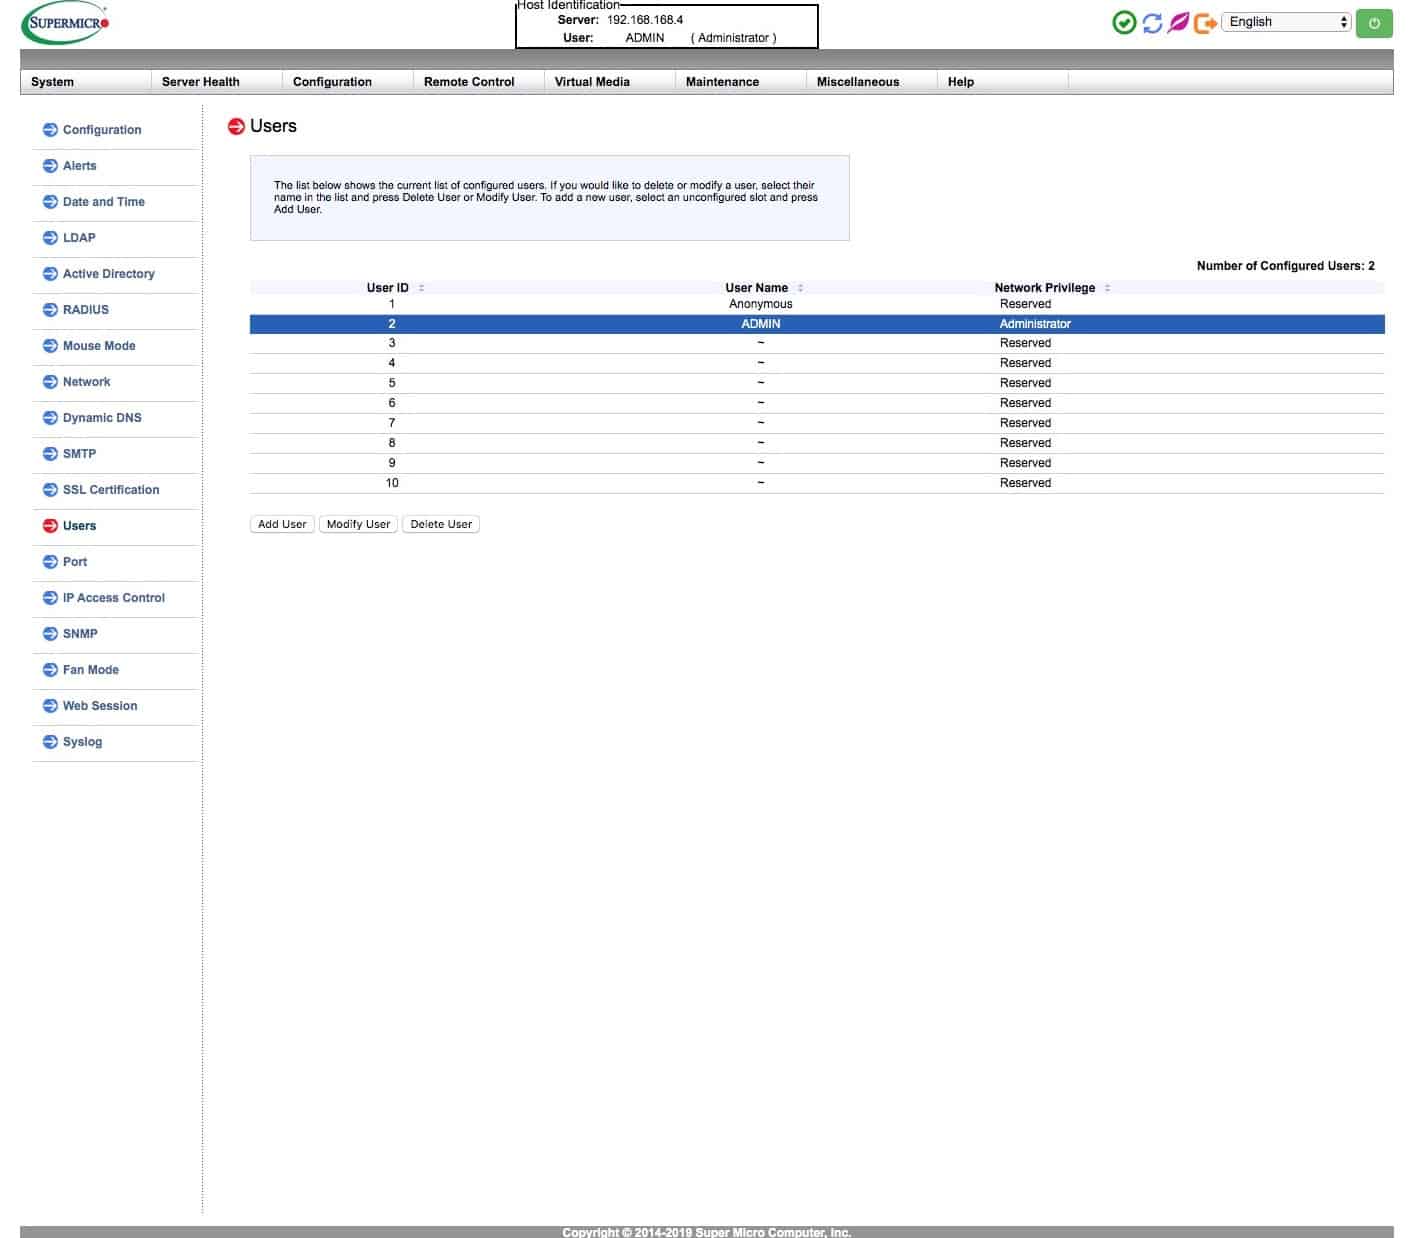
Once this started, I went back to the IPMI and assigned a fixed IP address for that and also changed the default admin password. This actually threw me a little during the build 2 blog, and one of my screenshots is also a little misleading, as I remembered the default user/password isn’t admin/admin but actually ADMIN/ADMIN! Again, it’s a little more complex now!
It was at this point that I started to think about how much manual configuration would be required when I could simply upload it from FreeNAS1. Sure, I’d named them differently so that would cause some problems, but it’d probably be easier to fix than manually creating, right? Well, the answer to that one is kind of!
The transfer took just over 2 days, which is about what I was expecting. Once everything was copied over, I stopped the replication job on FreeNAS1 and also switched off FreeNAS2. I had a couple of other things to fix before uploading the FreeNAS1 config.
I’d disconnected the 2nd SSD when sorting out the HDD issue, and I wanted to use it to mirror the boot device. It’s probably overkill, and mirroring was something recommended if booting from USB (which is how FreeNAS1 started life, although it starts backup duties with a single SSD boot drive). They only cost £20 (about the same as the USB drives when FreeNAS1 was built) so not a big expense.
Mirroring them is a snap, and you simply go into the System > Boot Environment settings, click Boot Pool Status, click the 3 dots against the top ‘pool’ line and select Attach. You then select the appropriate device and it takes a few seconds to mirror them. I think the 120GB drives are currently using about 5GB with a couple of boot images. That might grow with a few updates, but unlikely to ever get close to filling, and I have some redundancy if one dies.
Next, I wanted to fix the front panel jumper header that I’d clearly got wrong, as I didn’t have a blue power light on the front of my case. I think I’d just put them in 1 row up, so that was easy enough. So on to upload the config…
I saved the config from FreeNAS1 onto my iMac and the uploaded to FreeNAS0, which proceeded to reboot. I expected it to restart on the IP address assigned to FreeNAS1, so shut that down so there were no conflicts.
It did as expected and I logged into FreeNAS0 using the IP address and password for FreeNAS1. The pool was showing as missing, which gave me a small panic, but I simply imported the pool I’d called APEpool0 and deleted the pool in the config called APEPool1. I then reset the networking, and changed the IP address back to the one I’d assigned earlier (which was a waste of time!) and reset the password (again!)
It was then just a case of working through the config and looking for anything obvious to change:
System
General: Changed the IP address for the WebGUI to match the interface
Email: This is still working, but using a freenas1@ account so I’ll probably end up creating a freenas0@ account and reconfiguring, but one for later – now changed to freenas0@domain.com!
System Dataset: This has moved onto APEpool0 without me doing anything, so I ticked the Reporting Database and left it alone.
Alert Services: I do want to configure this to work with my Mattermost service, but I wasn’t for FreeNAS1 so another to come back to – now configured to work with Mattermost and E-mail
Tasks
Cron Jobs: I have a number of jobs set-up to run scripts for monitoring drives and UPS status. All I needed to do here was change the path where these were saved, changing the 1 to a 0 in APEpool. This turned out to be the main change I had to make, which is certainly quicker than having to recreate all of the configs
Init/Shutdown Scripts: I need to look into why I’ve got something in here
S.M.A.R.T. Tests: Change the drives to match the new settings
Periodic Snapshots and Replication Tasks: I’ll come back to this, once I’m using FreeNAS0 for everything, as I might reconfigure the pool on FreeNAS1 (from RAIDZ2 to RAIDZ1) to give me a little more space, slightly less redundancy, and then replicate everything back. Even if I don’t I’ll still need to configure backing up everything to FreeNAS1 and not FreeNAS2 (which isn’t powered up anymore) – replication back was covered in this blog
Scrub Tasks: I think I need to double-check this too, as I think I had this set more frequently and aligned to the scripts I run.
I’d already configured the Network and Storage settings, so next up was Directory Services, which I don’t use, so onto
Sharing
Unix (NFS) Shares: I have 20 of these, which all bar one are read-only. I mount to these shares from within my Ubuntu VM which is running CrashPlan to back things up to the Cloud. The only write share is to the docker dataset, so all my Docker config is saved on my FreeNAS box. Again, it was simply a case of editing the entries and changing APEpool1 to APEpool0 within the paths.
Windows (SMB) Shares: I only have 6 of these, which I use from my other devices to store data on FreeNAS. Again, nothing more complex than changing a 1 to a 0!
After I’d done that, I checked the Service settings for these and restarted the Services. I haven’t tried the NFS shares yet, but the SMB ones work fine.
Jails
This is the one I had the most fear around, as I run so many things I’m truly dependent on in jails. emby is one of the key ones, so I thought I’d try that first, but I needn’t have worried:
- Stop jail on FreeNAS1
- Edit Mount points in jail on FreeNAS0 (again, generally just a case of changing 1 to 0, although in a few cases I needed to go into the shell and move a folder that was to be mounted, but contained data, and create a new blank one in order to save the changes)
- Start the FreeNAS0 jail
- Change the FreeNAS1 jail settings so it doesn’t Auto-start on a reboot
And it was that simple for every jail! Marvellous!! I left the Limesurvey jail (which is currently running a survey) on FreeNAS1 as I will be deleting that and using the survey jail (due to problems updating the FreeBSD version, which I blogged about here) but otherwise they are all running on FreeNAS0 – my survey finished just before Xmas, so this is now running on FreeNAS0
I have a feeling Virtualisation won’t be quite so straight forward, so will cover that in a part 2 blog. I also have a problem in that I can no longer SSH into either FreeNAS1 or FreeNAS2 from my iMac. I can access the shell from the WUI, so it’s not a show stopper, but one I need to fix as it’s much easier from a Terminal window, especially when copying and pasting. I’m getting some help from the FreeNAS forum on that as we speak…
Otherwise, all looking good after just a few days. Not too shabby really.
Trackbacks/Pingbacks