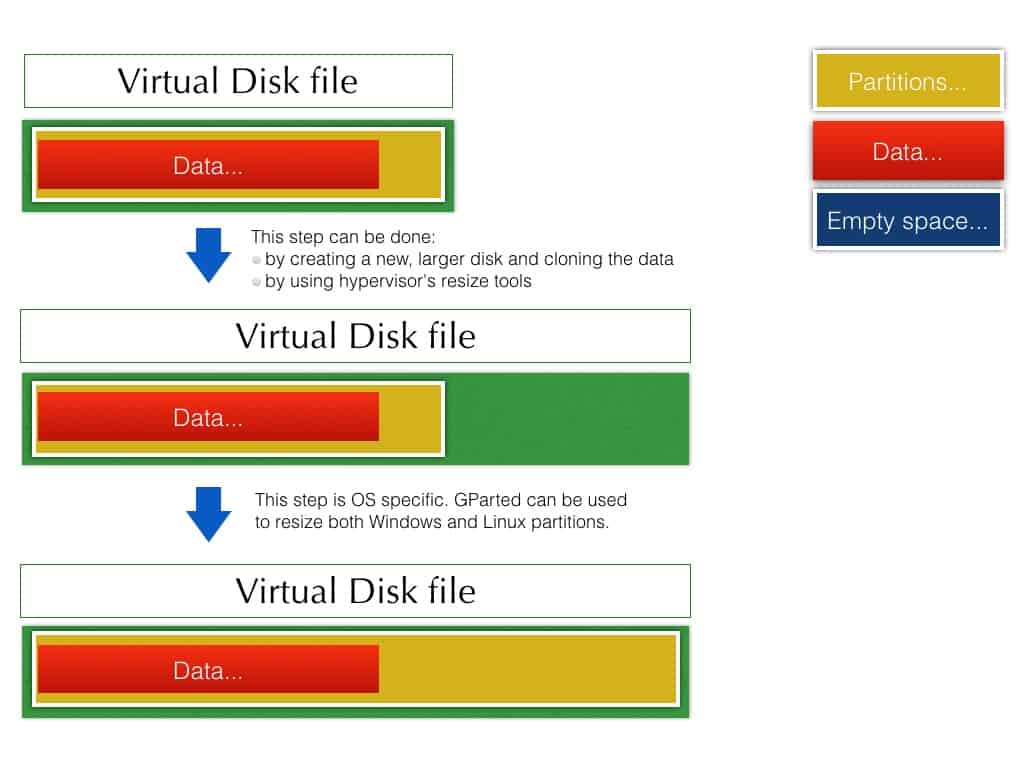
This is as much a reference for me as it is anything else, but I needed to resize a couple of virtual disks over the weekend, and these are the pretty simple steps to do it, at least for my FreeNAS configuration.
It started because my UPS decided to shut down for some strange reason, and so far I have no idea why. That will require some further investigation and possibly another blog, but it’s not great to find everything switched off when the power to the house is just fine.
Anyway, that was the why, this is supposed to be about how! I was actually quite happy as pretty much everything (jails and VMs) came back online within about 15-20 minutes of rebooting. The only things I thought hadn’t restarted were my iSCSI service (which I use infrequently on FreeNAS0 with BerryBoot, again for another blog) and my TrueCommander container on my Docker VM. I fixed both of these to auto-start so they shouldn’t be a problem moving forward.
Everything else appears to have worked perfectly, but around 24 hours later I noticed that some adverts weren’t been blocked by Pi-hole. It was allowing internet traffic, and from the homepage, it appeared to be running, although I could see nothing was being blocked. On further investigation, the virtual disk on the Pi-hole VM was completely full, as I’d only assigned it 10GB when it was created. I could have probably tried to free up some space, but given I’ve still got over 20TB of free space on FreeNAS0, I thought the easier solution was to increase the size of the virtual disk. This works something like the diagram below (which I found on the internet and the blue legend really should be green!)

I’ve done this before on FreeNAS1, and had even blogged about it a little here, but I needed to Google a few other things so thought a more detailed blog might avoid that in the future. I didn’t document things when I increased the virtual disk for Pi-hole from 5GB to 50GB, but I decided to check the other VMs and noticed the Docker one was around the 85% mark (that had 50GB assigned) so I thought I’d bump that to 200GB and document the steps below:
Increase the zvol size
The first step is to shut down the VM as I’m not sure messing around with the zvol size when it’s running is a great idea. After that, it’s just a case of going into the Storage > Pool > Iohyve dataset and editing the appropriate zvol. I’d let FreeNAS name them when I created them, so I needed to check in the VM settings to identify which was which! Also, beware! Increasing the size isn’t a problem, but bad things will happen if you try to go the other way.
Restart the VM
Next, restart the VM and SSH into a terminal window.
- df (this will display the current partition structure)
- sudo fdisk /dev/sda (runs the partition manager)
- p (displays the partitions and their start and end blocks – make a note of them as you will need to reenter)
- g (greats a new GPT table)
- p (check the partitions have gone)
- n (recreate each of the devices with the correct sizes from above – I have two so repeat this step)
- p (check the new partition sizes)
- w (writes the changes, which can screw things up if you’ve got anything wrong)
- reboot
Mine are all pretty straight forward as I only have 2 partitions – sda1 and sda2. I keep sda1 the same size and increase sda2 to make use of the additional space created when increasing the zvol size. I don’t bother with swap space on any of the VMs, but this could be added or recreated assuming you’ve left enough space and created another device. Check out this blog here for the extra steps required.
Resize the file system
The last step is to increase the file system, which doesn’t happen automatically.
- df -h (displays the partition structure, which shouldn’t appear to have changed)
- sudo resize2fs /dev/sda2 (resizes the partition)
- df -h (check the size has increased)
And that’s it, you’ve resized virtual disks! You might want to reboot, although I don’t think it’s entirely necessary. You’ll also want to configure the swap space if you’re using that.
Anyway, hopefully, useful for anyone needing to increase the size of the virtual disk in FreeNAS for a Linux VM, and I’m sure it will be a useful guide for me when I need to do this again (although all of my virtual disks have less than 20% used space, so hopefully not for a little while).

Recent Comments