So after a painless FreeNAS upgrade, it was time to make use of the new jail management system, iocage, and rebuild my warden jails…
Before we start, I was never expecting this to be a painless process, and fully expected to have issues with at least some of the jails I use. The fact I’ve managed to get almost everything migrated and running from iocage jails within 3-4 days of upgrading FreeNAS has surprised me though, made even sweeter by the fact it should be the last time I’ll need to do it.
Another thing worth taking into account is the current state of iocage. Here’s what it says in the current 0.9.9.2 documentation regarding VIMAGE/VNET:
VNET is considered experimental. Unexpected system crashes can occur.
More details about issues with VNET are available in the Known Issues section of
this documentation.
It’s fair to say iocage is relatively new, and still isn’t fully baked into the FreeNAS UI. Whilst there is a Jails section in the new Beta UI which displays all of the iocage jails, the functionality for creating and managing them isn’t recommended, and all comments in the FreeNAS forums point to only using iocage through the Command Line Interface (CLI) until the 11.2 release.
This isn’t necessarily a bad thing, as knowing some of the commands and understanding a little more about how it works is always useful, even if in the long run it might not be used that much.
I’m not going to try and document every command I entered as it would take all day, and you’d probably die of boredom before you got anywhere near the end! The documentation is pretty good, and a great place to start, but here are a few commands that you’ll use over and over again if you do anything similar:
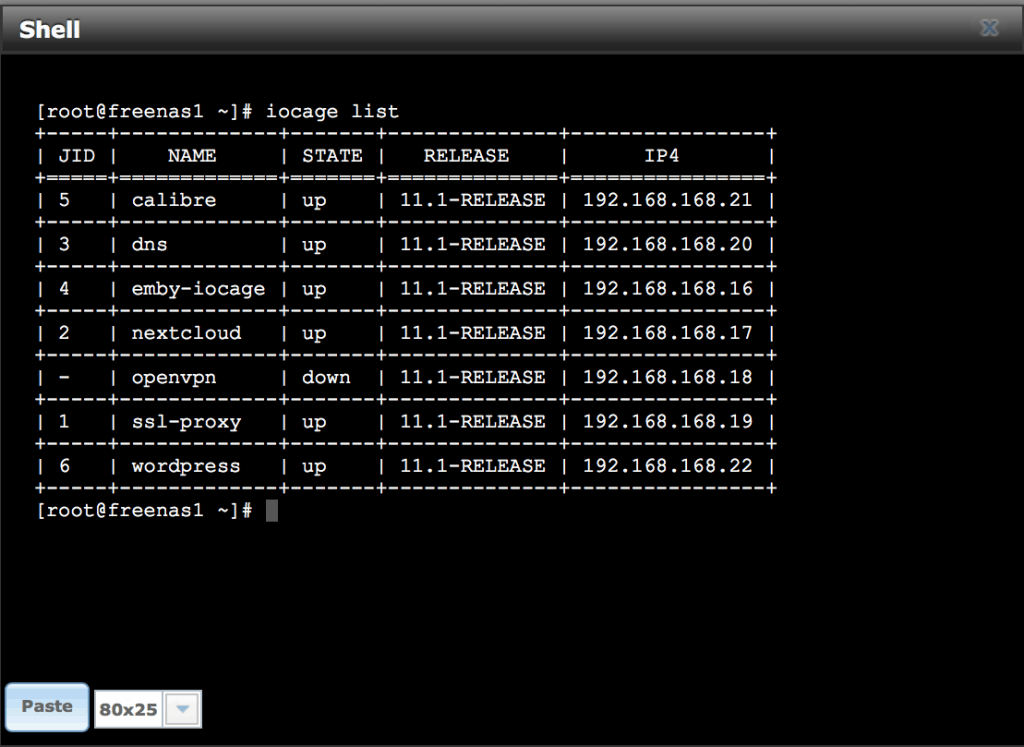
- iocage list shows a list of your jails and their status and looks like this:

- iocage restart <jail-name> restarts the jail
- iocage get all <jail-name> shows all the options and properties that can be configured with iocage set <option>=<property> <jail-name>
- iocage fetch -r 11.1-RELEASE downloads the versions of FreeBSD to use in the jails (I only downloaded the latest)
- iocage create -n <jail-name> -r 11.1-RELEASE ip4_add=”<adapter|IP/MASK>” defaultrouter=”IP” vnet=”on” allow_raw_sockets=”1″ boot=”on” is the default command I used for creating my jails
- iocage fstab -a <jail-name> “/mnt/tank/dataset /mnt/path-in-jail nullfs rw 0 0” allows you to mount storage on the FreeNAS pool inside the jail (this is really useful, as it can’t be done in the UI at the minute, and almost all my jails mount to somewhere on my zpool. iocage fstab -l <jail-name> displays a list of the fstab mounts and iocage fstab -r <jail-name> <index> removes the index line
And that’s pretty much all I used for the 7 iocage jails I created. Once it’s running, you enter the jail with iocage console <jail-name> (or jexec <JID> tcsh just like you did with a Warden jail) and from that point, it’s not really any different. The command jls still works and actually displays both iocage and warden jails running on the system!
I was going to describe my experiences creating the iocage jails in this blog, but it’s already dragging on so I’ll do that in another one to follow…

Trackbacks/Pingbacks